First Run
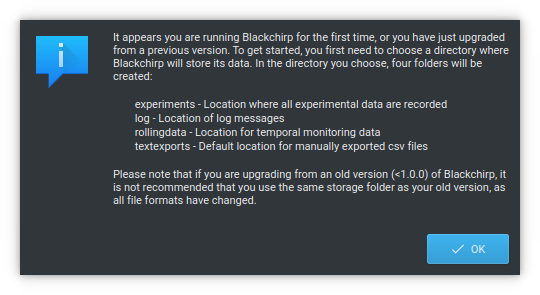
If you are running Blackchirp for the first time, you will be prompted to perform a few initialization tasks.
Data Storage Location
After clicking “Ok”, you will be taken to a dialog where you may select your desired location.
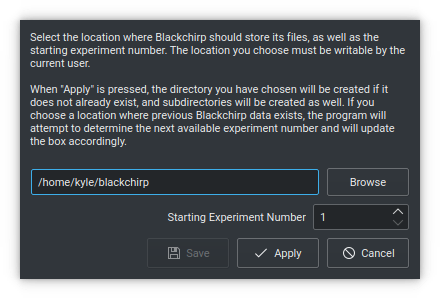
When you click the “Apply” button, Blackchirp will attempt to create the folder and, if successful, will then make 4 subdirectories:
experiments: Storage for experiment data files
log: Location of program log files
rollingdata: CSV files containing monitoring data
textexports: Default location for XY export files for graph data
Blackchirp stores experiment data by number: the first experiment recorded is number 1, and the number is incremented automatically. If the folder you selected already contains Blackchirp data, the program will attempt to set the starting experiment number the next available value, but this can be done manually if desired. It is strongly recommended that you start from experiment number 1 if you are selecting a new folder location.
The data location and experiment number are written to a configuration file, and the next time the program is started, these settings will be recalled.
The location of the configuration file is platform-dependent: on Linux, the default location is ~/.config/CrabtreeLab/Blackchirp.conf.
Experienced users may wish to edit the configuration file, but most settings can be directly made from the Blackchirp user interface, so it is not recommended to manually alter the config file unless you know exactly what you are doing.
Once you have hit the “Apply” button, the “Save” button will become enabled if creation of the data directories was successful. Click the “Save” button to continue.
Hardware Communication Settings
After selecting a data storage location, Blackchirp will open the Hardware Communication Dialog shown below.
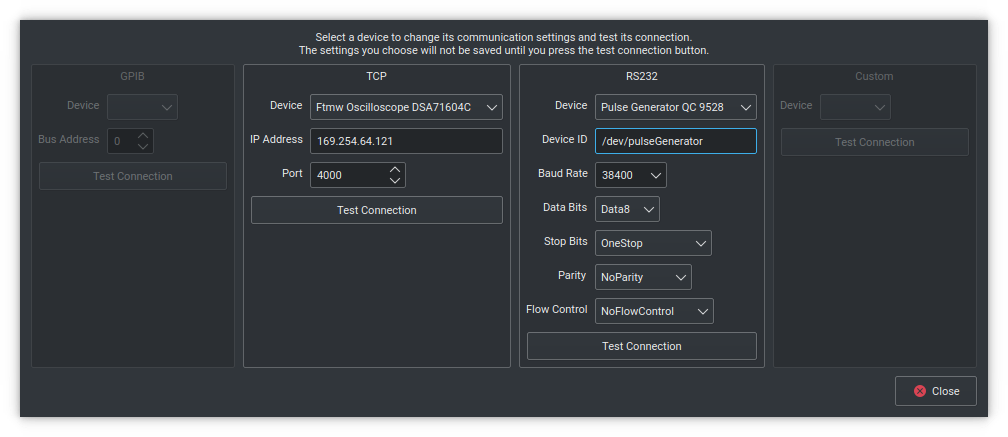
From this window, you can enter connection information for any GPIB, RS232, TCP or custom instruments that are connected to the program. This process is optional; it can be done at any later time by opening the Hardware > Communication menu item. If hardware is compiled in, then each hardware item will appear in one of the dropdown boxes. Select a hardware item, enter the appropriate information (IP address, path to device file, etc), and hit the associated “Test Connection” button. The result of the communication test will be displayed in a popup box. For more information about this dialog, see the Hardware Menu page. When finished, close the dialog, and the main user interface will be displayed.