First Run
The first time Blackchirp starts on a new system (or with a fresh configuration), it walks through two setup dialogs before opening the main window:
Initial Configuration — choose where experiment data is stored and review application-wide settings.
Hardware Configuration — assign drivers to the hardware on this instrument and confirm that any required vendor libraries are loaded.
Both dialogs are accessible later from the application menus without repeating the full sequence.
Initial Configuration
The first dialog is titled Welcome to Blackchirp — Initial Configuration and has two sections: Data Storage and Application Settings.
Data Storage
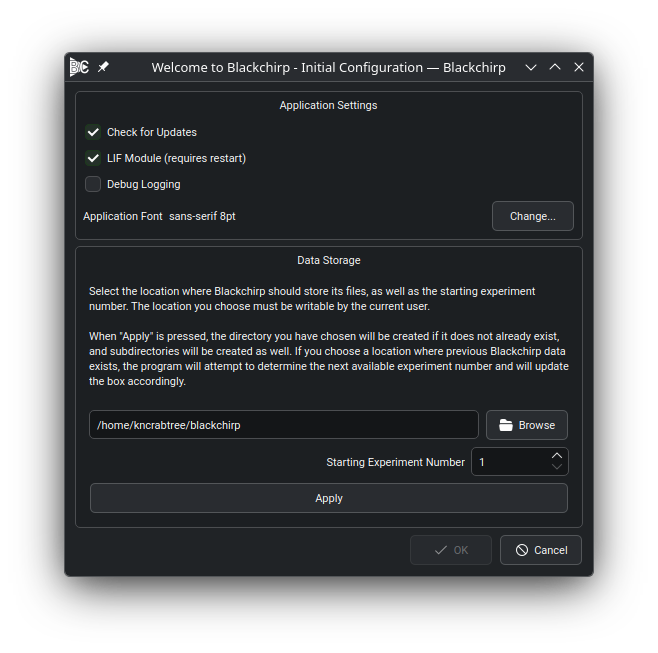
The Data Storage section of the Initial Configuration dialog.
Choose the directory where Blackchirp will store experiment data, log
files, rolling-data CSVs, and text exports. Click Browse to pick a
directory or type the path directly, then click Apply. Blackchirp
creates the four standard subdirectories (experiments, log,
rollingdata, textexports) if they are not already present.
Experiments are numbered sequentially. If you point Blackchirp at a directory that already contains data, the spin box auto-fills with the next unused number; override it manually if you need a specific starting point.
See Data Storage for the on-disk layout under each subdirectory.
Application Settings
The lower portion of the dialog exposes the same application-wide options as Settings → Application Settings: the LIF module toggle, the daily update check, debug logging, and the application font. Default values suit most installations.
See Application Configuration for the full option reference.
Click OK to close the dialog. The Hardware Configuration dialog opens next.
Hardware Configuration
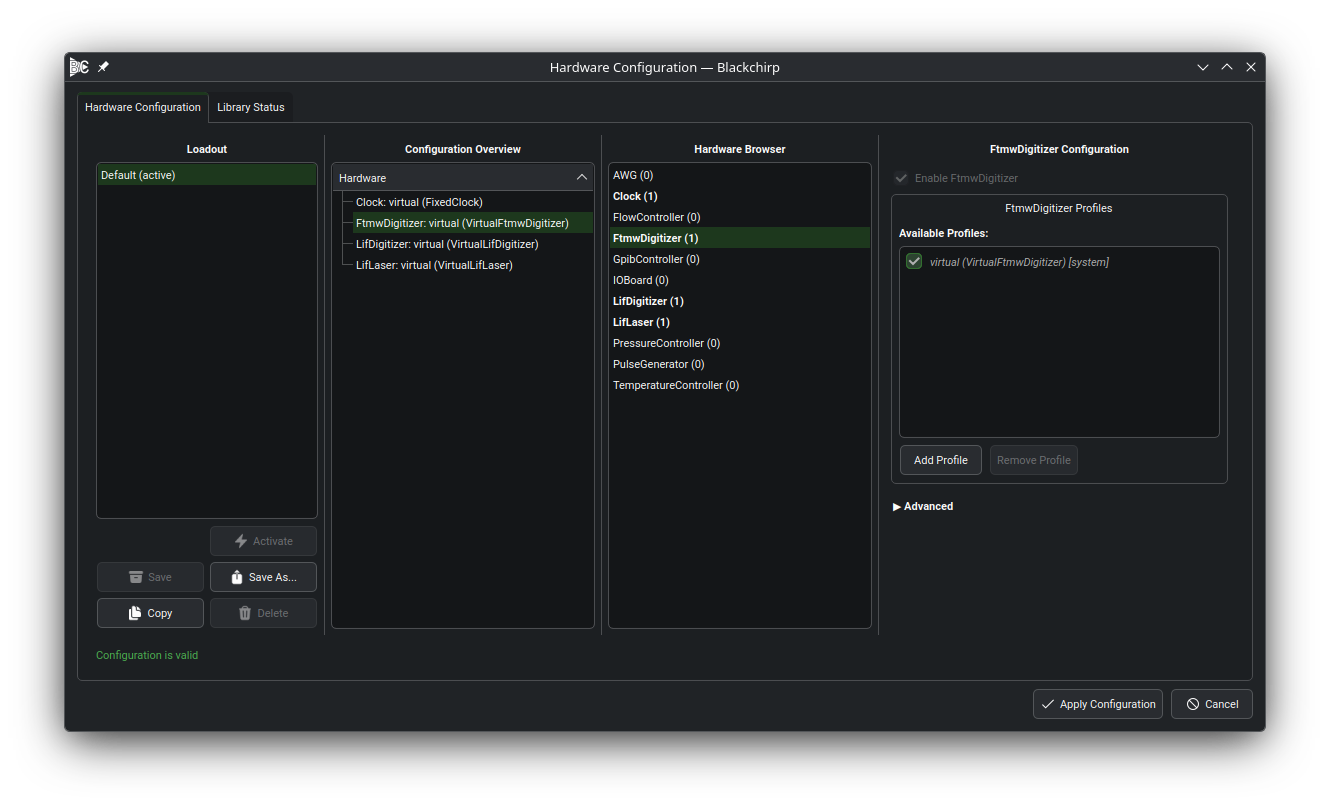
The Hardware Configuration dialog.
The Hardware Configuration dialog is where you tell Blackchirp which instruments are connected to this system. It has two tabs: Hardware Configuration and Library Status.
On the Hardware Configuration tab, create at least one loadout — a named collection of hardware profiles that together describe a complete instrument. A profile assigns a driver to a single piece of hardware (for example, a Tektronix DPO73000 as the FTMW digitizer); a loadout groups one or more profiles for every required hardware type. An experiment cannot start until a valid loadout is active.
See Hardware and Library Configuration for the full walkthrough of profile creation, loadout management, and FTMW presets.
Library Status
The Library Status tab lists every vendor-supplied driver library Blackchirp recognizes and shows whether each was located on this system. Some hardware — LabJack U3 IO boards and Spectrum Instrumentation digitizers, for instance — depends on a vendor library installed on the host; if the relevant library shows Not Found or Error, the corresponding hardware will fail to connect.
Confirm that the libraries your instrument needs are Available. If a required library is missing, follow the installation guidance in Library Status.
After accepting the Hardware Configuration dialog, the main window opens. You are ready to run experiments.