Hardware and Library Configuration
The Hardware Configuration dialog (Hardware → Hardware Selection) is where Blackchirp is mapped to the physical or virtual instruments on this system and where vendor-supplied driver libraries are checked for correct installation. It is the same dialog that opens during Hardware Configuration on a fresh system, and it exposes two tabs: Hardware Configuration (profiles and loadouts) and Library Status (optional vendor libraries).
Blackchirp identifies and manages hardware through two layered concepts:
- Profiles
A single physical or virtual instrument. Each profile binds a hardware type (for example, FTMW Digitizer or AWG) to a human-readable label and a driver. Per-profile settings — number of digitizer channels, AWG sample-rate tables, and so on — persist across application restarts.
- Loadouts
A named collection of profiles that together describe a complete instrument: one or more profiles per hardware type, covering everything Blackchirp needs to run an experiment. Loadouts make it convenient to switch between, say, an 8–18 GHz instrument and a 26–40 GHz instrument. A profile may appear in any number of loadouts.
A running experiment uses one active loadout. The FTMW operating point used within that loadout — captured as an FTMW preset — is managed in the FTMW Configuration dialog and documented under FTMW Configuration.
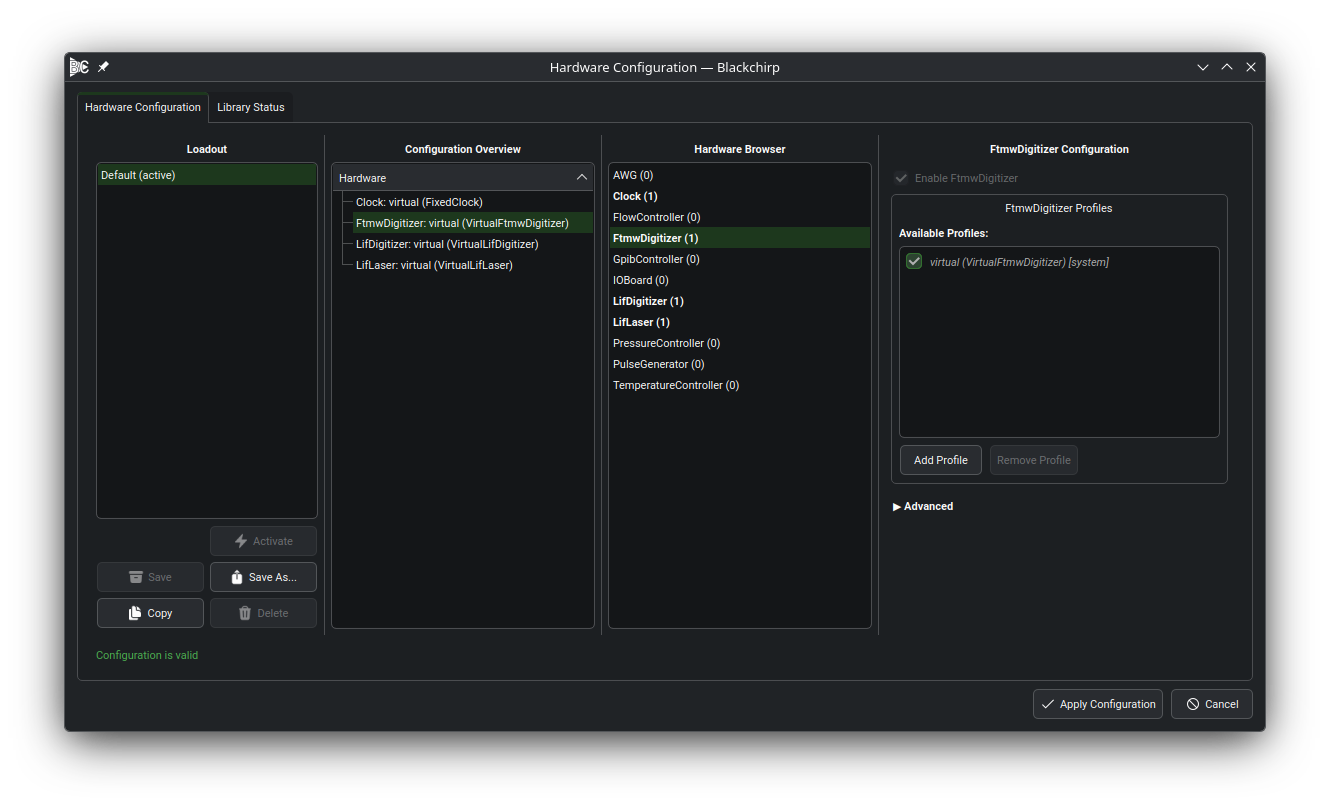
The Hardware Configuration dialog. From left to right: the Loadout panel (saved loadouts and loadout-level operations), the Configuration Overview (preview hardware map), the Hardware Browser (count of profiles per supported type), and the Configuration panel (per-profile settings for the selection). The validation status bar across the bottom reports whether the preview is valid; the Apply Configuration and Cancel buttons govern what happens to it.
The dialog operates on a preview of the configuration: edits made in the panels are held in memory until they are persisted to a loadout (Save) or pushed to the running application (Apply Configuration). Typical flow: pick or create a loadout in the Loadout panel, use the Hardware Browser to add or select a profile, edit it in the Configuration panel, then Save to commit to the active loadout (or Save As for a new one) and Apply Configuration to push to the running app. See Loadouts for full preview-state semantics.
In this chapter
- Hardware Profiles
How profiles are created, labeled, and managed. Covers the Type / Label / Driver triple, the settings priority sections (Required, Important, Optional / Advanced), and enabling or disabling profiles within a loadout.
- Loadouts
What a loadout is, how to create and switch between loadouts, and the preview-state semantics that protect against accidental discards. Covers the drift-detection prompt that appears when hardware changes would invalidate existing FTMW presets.
- Library Status
The Library Status tab: vendor-library load state, search-path configuration, and per-library installation guidance.