Experiment Setup
An Experiment is the basic acquisition event in Blackchirp. It may
consist of CP-FTMW measurements, a laser scan, or both; the two halves
are configured on parallel pages:
FTMW Experiment Setup covers the
FTMW acquisition type and its parameters, and
LIF Experiment Setup covers the
laser-scan axes and options. FID records from the FTMW Digitizer are
averaged in the time domain; the average FID and its Fourier transform
are viewed on the CP-FTMW tab.
Auxiliary Data is also recorded throughout
the run.
An experiment ends when one of the following conditions is met:
The objective of the experiment is reached (e.g., the requested number of shots has been collected).
The user clicks the
Abortbutton.One of the validation conditions falls outside the designated range.
A communication failure occurs with a critical piece of hardware.
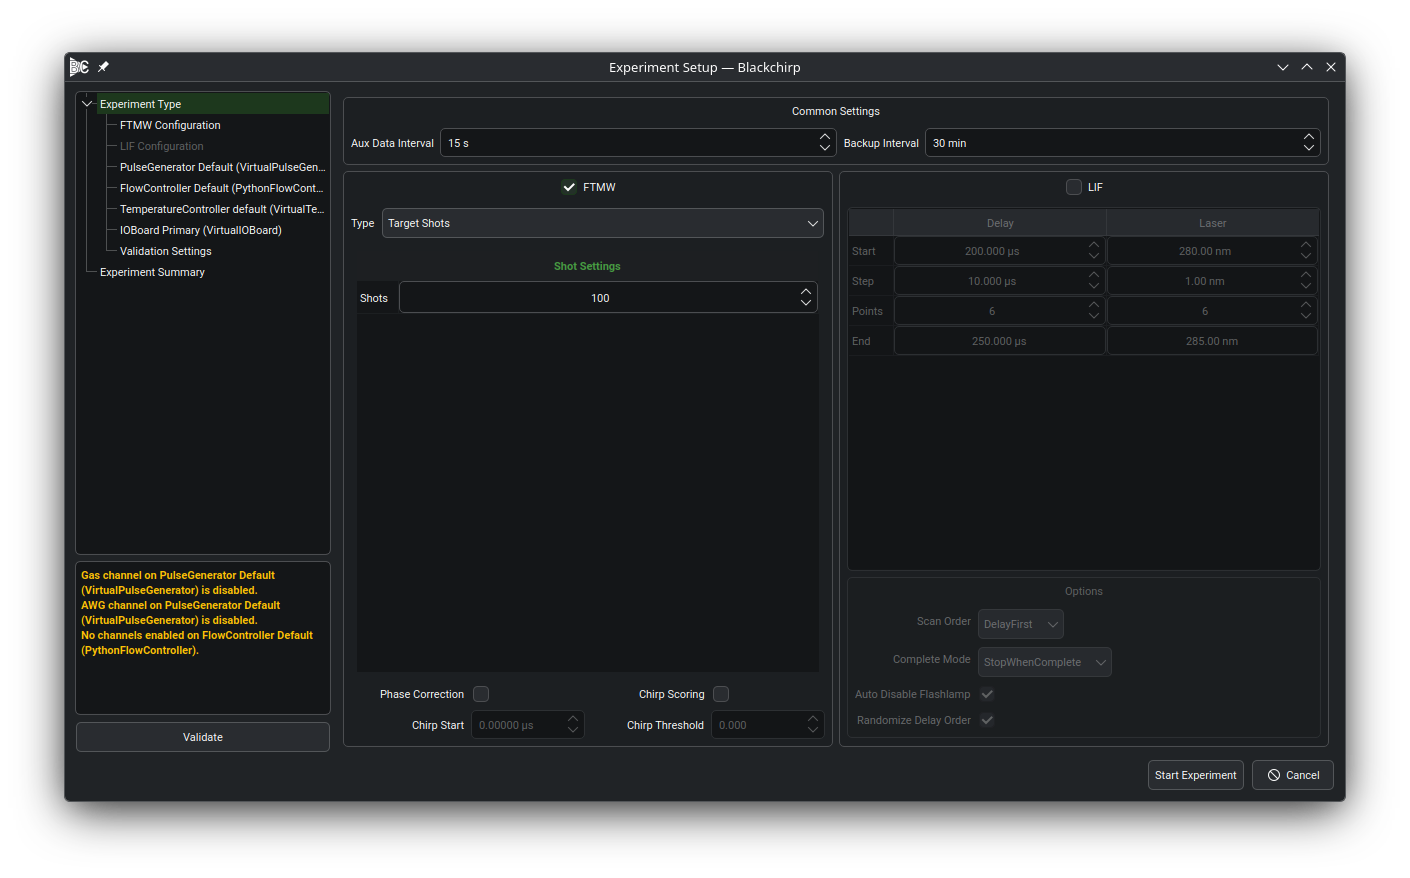
To start an experiment, select an option from the Acquire menu in
the Main Toolbar. Start Experiment
opens the Experiment Setup dialog, which collects the
Common Settings
that apply to every experiment, the
FTMW and (when LIF is enabled)
LIF parameters on the first page, the
FTMW Configuration (Rf Configuration,
Chirp, and
Digitizer), settings for
any present optional hardware,
and the desired validation conditions.
The dialog is divided into three regions:
A navigation tree on the left lists every configuration page in the order in which they are applied. Clicking an entry switches the right pane to that page. The tree starts fully expanded. Pages whose hardware or feature has been disabled (for example, an optional device whose group box is unchecked) are greyed out and skipped during validation.
A status area below the navigation tree collects warnings and errors emitted by the configuration pages during validation. Warnings and errors are rendered in distinct theme-aware colors so they can be distinguished at a glance.
A page area on the right shows the currently selected configuration page.
The Validate button at the bottom of the left column re-runs the
validation logic on every enabled page and refreshes the status area
without committing any settings or closing the dialog. Use it to check
the dialog state at any point during configuration. Start
Experiment performs the same validation and, if every page passes,
applies the settings and closes the dialog so initialization can
begin. Cancel discards the dialog state without starting an
experiment.
A past experiment can be repeated through the Quick Experiment action, which pre-populates the dialog from a saved experiment.
After the dialog closes, Blackchirp initializes each device in turn;
errors during initialization cancel the experiment and surface on the
Log tab. Once initialization succeeds, a new data folder is
created and acquisition begins.
Common Settings
The first page of the dialog contains a Common Settings group at
the top with two parameters that apply to every experiment, regardless
of the FTMW acquisition type or whether LIF is enabled.
The Aux Data Interval box sets the period between
Aux Data readings. More frequent readings
increase data storage requirements but provide more regular
opportunities to automatically abort an acquisition using one of the
validation conditions.
The Backup Interval box sets how often Blackchirp writes a backup
copy of the experiment to disk during a single-segment acquisition.
Setting the box to its minimum value displays Disabled and turns
backups off. Multi-segment acquisition types
(LO Scan and
DR Scan) write a backup
at each segment boundary regardless of this setting. In addition to
the periodic backup driven by this setting, a single-segment
acquisition can be backed up on demand from the CP-FTMW toolbar; see
Manual Backup.